Imagine a typical residential garage door system, it looks like below:
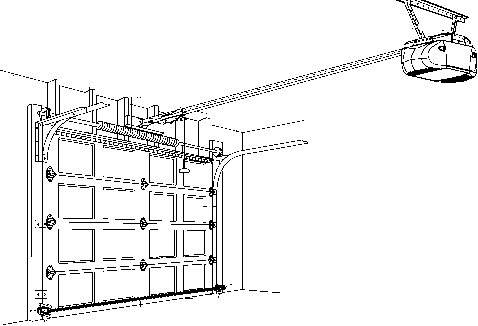
There is a ceiling, a pair of tracks, and a door which pulls up through those tracks parallel to the ceiling.
Now, imagine that this garage door is controlled by three methods today:
- Manual override pull chain
- A doorbell-type button
- A key-code switch outside
Now, imagine that you want this door controlled by (and state known by) your Home Assistant. You want to lay on your couch and say “OK Google, Open Left Garage Door”. Or maybe you want to be on the other side of the planet and let someone in.
Turns out that a few $ in parts and a little coding, you can be there.
So, lets think about it. A sensor… How do we know the door is open? Well, lets use a distance (sonar) sensor like the HC-SR04. Mount it on the ceiling and point down. When the door is closed, the distance is ~2m. When the door is open, the distance (from ceiling to the door which is now parallel to it) is ~20cm.
A switch. Well, I have two garage doors, and one is an AC-signal (shorted by the button) and one is DC. O well, we’ll use a relay.
Lets wire this up:
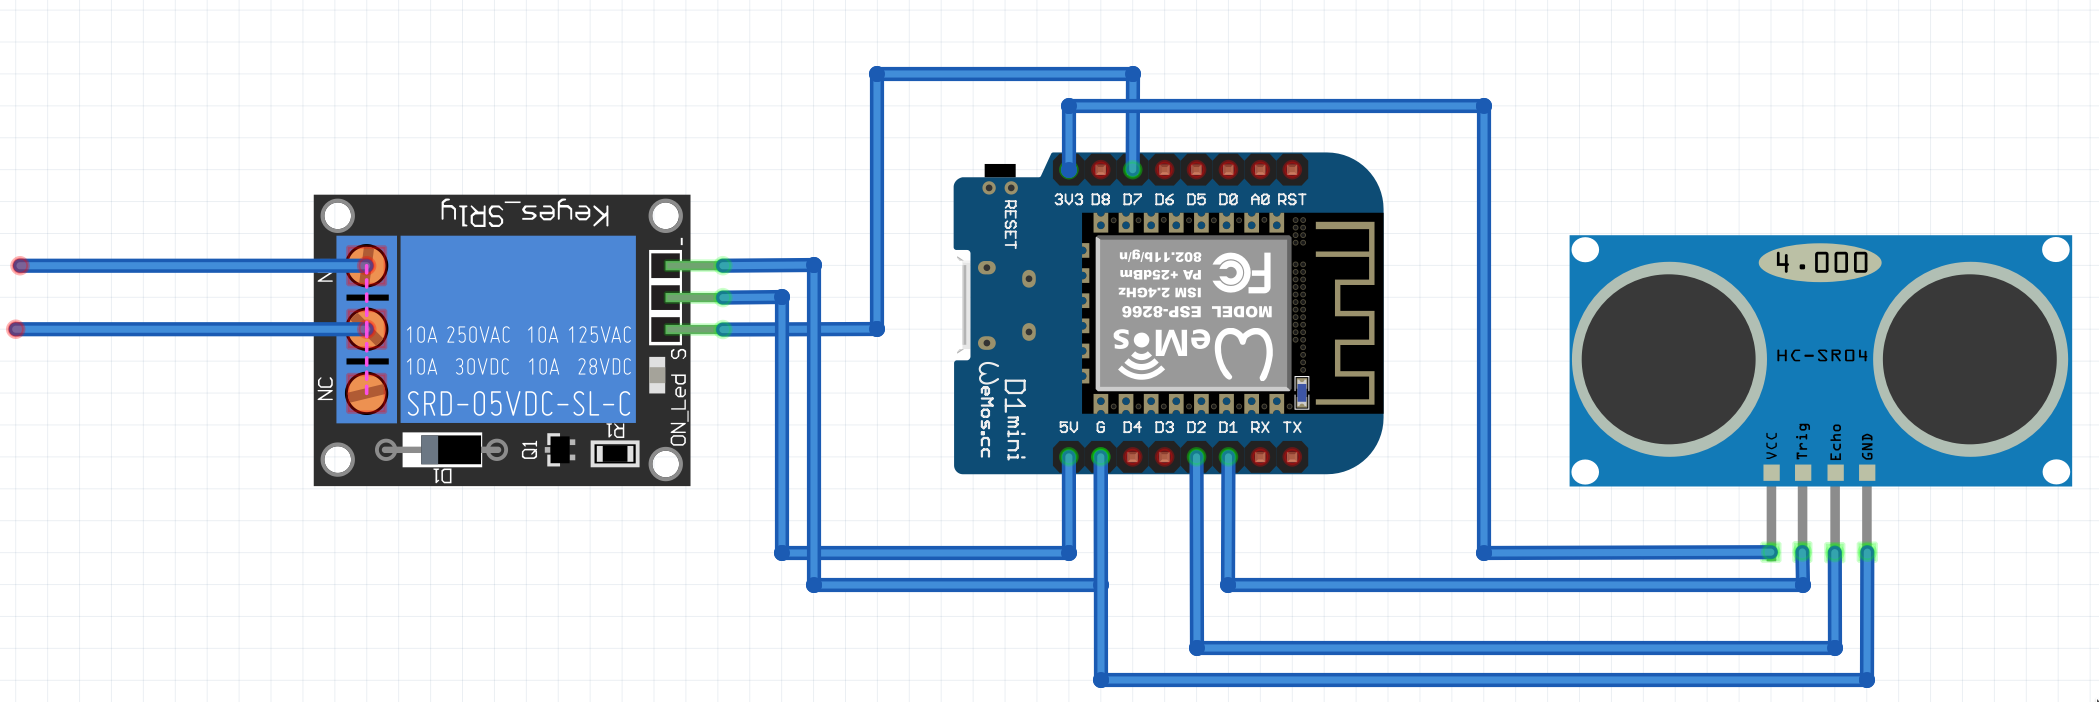
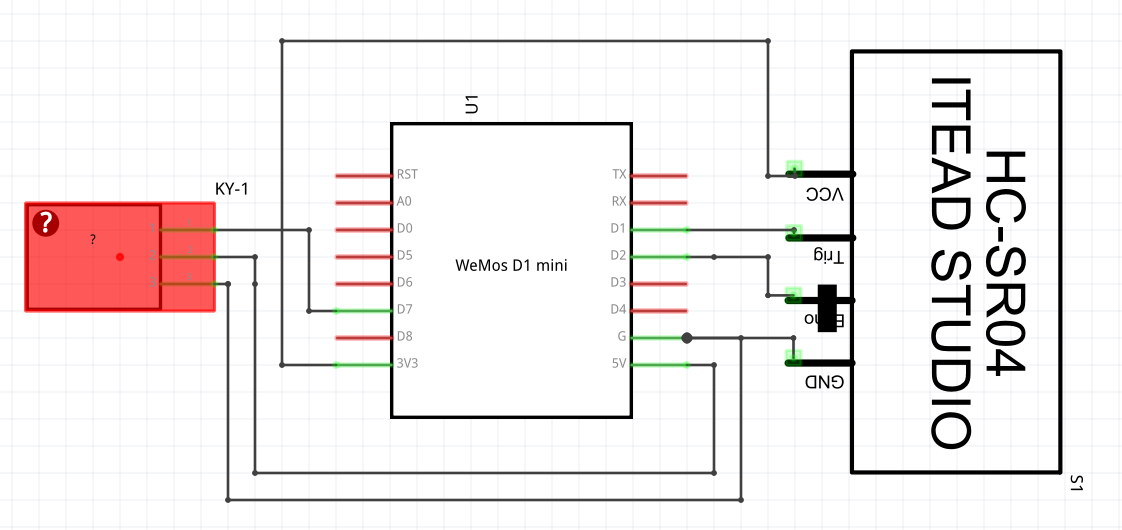
Boom, we know have a wifi-enabled point that can read the state of the door, and also change its state (by pulsing the relay).
If we look at a little sample code:
#include <Arduino.h>

#define SPEED_OF_SOUND 343 // m/s
#define PERIOD_CM 10000.0 / SPEED_OF_SOUND

#define TRIGGER 5
#define ECHO    4
#define RELAY   13

// NodeMCU Pin D1 > TRIGGER | Pin D2 > ECHO | Pin D7 > Relay

void setup() {
  pinMode(RELAY, OUTPUT);
  digitalWrite(RELAY,LOW);

  Serial.begin (115200);
  pinMode(TRIGGER, OUTPUT);
  pinMode(ECHO, INPUT);
  pinMode(BUILTIN_LED, OUTPUT);
}

void loop()
{
  long duration, distance;
  digitalWrite(TRIGGER, LOW);
  delayMicroseconds(2);

  digitalWrite(TRIGGER, HIGH);
  delayMicroseconds(10);

  digitalWrite(TRIGGER, LOW);
  duration = pulseIn(ECHO, HIGH);
  // wave goes to object and back, so divide by 2
  distance = (duration/2) / PERIOD_CM;

  digitalWrite(BUILTIN_LED, distance < 10 ? HIGH : LOW);
  digitalWrite(RELAY, distance < 10 ? HIGH : LOW);

  Serial.print(distance);
  Serial.println(" cm");
  delay(1000);
}
we can see on the serial port the distance. And, every time we wave our hand, the LED will blink and the relay will change state.
From here we can add an MQTT library, hook it to Mosquitto, and thence to Home Assistant.
If we 3D print a case, add an AC to 5VDC power supply, we are more or less done. Add an IEC 60320 C2 connector (AKA a shaver plug) for power, and we are good to go.

Leave a Reply